Frozen Fever Birthday Party

Henley has been planning her birthday theme for months, in case you're interested she has plans for her fifth and sixth birthday as well.

I tried to keep this simple and just focused on small details that would give the most return.


For the banner I used my Silhouette Cameo to make the shapes and cut out the letters. I also purchased the Frozen Fever jpegs from Etsy and used the Silhouette print and cut feature to cut them out.  I also used these same images for the favor bags. The kraft bags were purchased from Target.


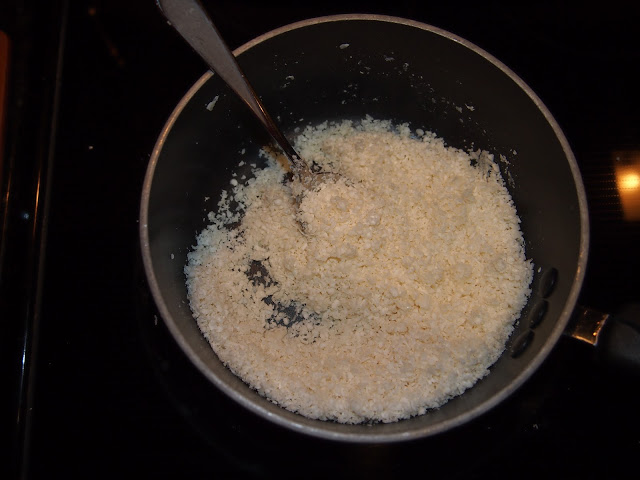
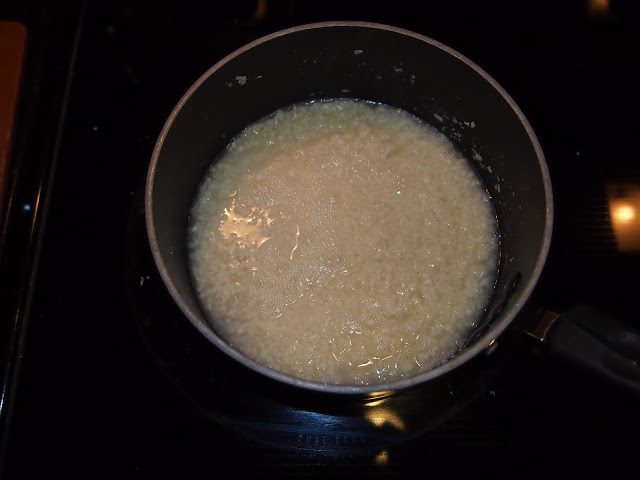
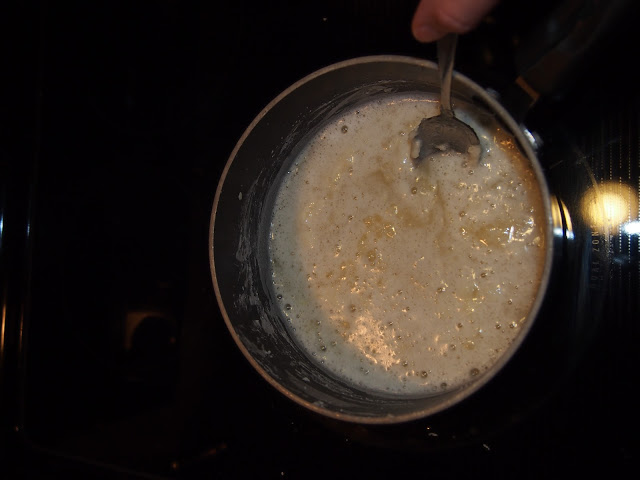
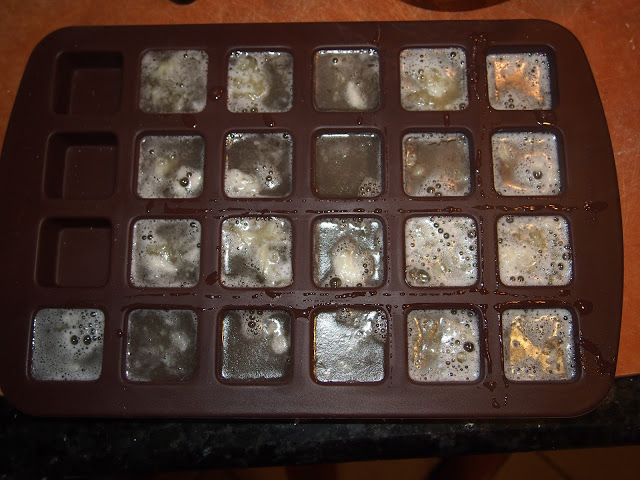
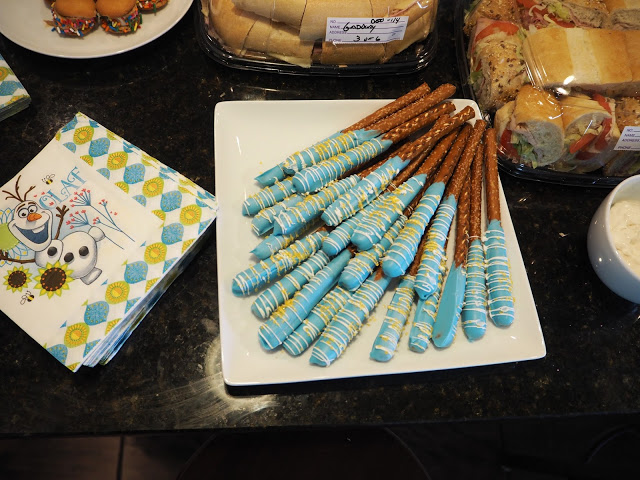
Pretzel rods dipped in light blue candy melts, drizzled with white chocolate and sprinkled with yellow sugar.


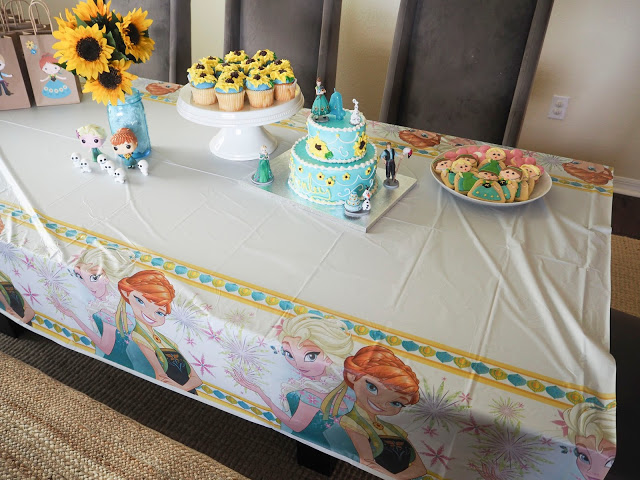
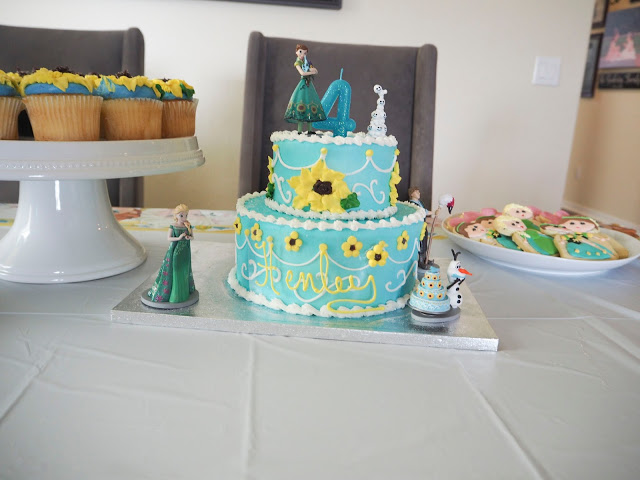
Cake was from Publix. They did a great job. 


I had beer and iced tea for the adults and made a punch for the kids. I used blue Hawaiian punch, 0.5 liter of Sprite and about 4 scoops of pineapple sorbet. The kids loved it and I think just the idea of the spout makes them want to drink it. Every time we have a drink in this container Henley and her friends love serving themselves. 

The party was great. I ordered all of the food from Publix to make it easier on myself, subs, fruit and a veggie tray. We were in Disney the few days before so I wanted to be realistic in what I would accomplish. We had a bounce house and the kids were worn out by the end of the day. Besides the record breaking heat, everything was fun. If these temps continue we might be having a December pool party for Henley. 

I still can't believe she's four but it is what it is. More to come from my oldest little one!

::Craftie:: DIY Halloween Queen of Hearts

Halloween is right around the corner and I start looking forward to Halloween in August. I love this time of year and I feel like preparing for Halloween really kicks off our Florida “Fall” (since the weather sure isn’t going to let us know the holidays are fast approaching). This year I was extra excited to get our costumes planned since we were planning a trip to Disney for the Mickey's Not-So-Scary Halloween Party.


This year after some back and forth on various costume ideas, we decided on Alice in Wonderland. Henley was quick to claim the Queen of Hearts as her costume and the rest of us fell in line---Macie as Alice, me as the Cat, and Dad as the Mad Hatter.


One evening while trying to procrastinate bedtime, she was looking over my shoulder as I scrolled through Pinterest. She immediately pointed out one of the pins for her costume, of course it was the most involved of all of the Queen costumes we saw. After some attempts at persuading her to choose a different costume and losing at said negotiations, I took her selection as a challenge.


Admittedly, I was a little annoyed she picked an elaborate costume but once I broke down the individual pieces it came together pretty quickly.


First up was her shirt. I just took a black t-shirt and added a red glitter heart. I heat pressed Heat Transfer Vinyl for hers but there are a few different ways you could accomplish this same look (paint, stencil, iron-on, etc). I then picked up some white satin ruffle from Hobby Lobby and sewed it to the neck for a collar. The picture I was going off of used tulle for the collar but I was sure she would think it was itchy all night.


For the skirt, I used lots and lots of tulle looped around an elastic. I think in the end I used almost 8 spools of tulle. I tried to convince her to have a short tutu but in typical toddler fashion, her mind was made up.


Once I had the tulle tied on in the various colors I tied some black and white diamond ribbon on the sides of the front and knotted the black tulle to look like tufts.


Hobby Lobby sells glitter canvas material (located near the felt) is tons of great colors. I have used this for glitter bows in the past and thought it would be perfect for the hearts on the front of the skirt. I used my Silhouette Cameo to cut them out and attached it to the white tulle using hot glue.


I ordered a headband from Etsy and picked up a wand at Toys r Us to finish it up, she couldn’t be more thrilled. It’s been finished for a few weeks as we were pretty busy and I wanted to allow myself enough time to complete. She has begged me off and on to let her wear it. Being the princess that she is, Queen is the next logical step in her reign.


Have you guys been DIY’ing any costumes for the littles? Please share!!

::Baby G Take 2:: Nursery is Complete

It's done! Albeit, much later than it was done with Henley but either way we are good to go with Macie's Nursery. Here are some pictures and details :-)

dresser, changing table, and crib all from Henley's nursery
Rug from Ikea
Curtains blackout from Target
Turquoise bin for toys from Ikea


Wooden sign DIY
  

Elephant DIY

Monogram Etsy shop 'A Charmed Nest'
Crib skirt DIY
Sheet Babies r Us

Blanket DIY


Recliner Ashley Furniture
Changing pad cover Babies r us
Organization bins Ikea


Decal from Etsy shop 'Leen the Graphics Queen'


Prints from Etsy shop 'Daphne Graphics'


Enjoy! 

Mere :-)

::Fluff:: Cloth Wipe Solution

The weekend is almost over unfortunately but before we get started with another blah week of work, I have a little craft/diy to share!

As most of you know, we are planning to cloth diaper Henley and we have all of the stash ready to go for her (I plan on posting the stash this week). I have read tons of advice from cloth diapering mama's that says it's easier to use cloth wipes if you are already cloth diapering since you don't have to separate the disposable wipes from the diaper when you put them in the diaper pail. If you use cloth wipes, you need to use a wipe solution since the wipes will be dry. Some people soak the wipes in the solution and put in a warmer (which is what we are planning) and other just spray each wipe with solution before each use. 

These solutions can be purchased from sites like Diaper Junction or Cotton Babies but since I assume I'll be using a lot of it, I thought it might be advantageous to make my own---plus this way I'll be able to control the ingredients. I decided to go with solution cubes which are a concentrate that can be dissolved into water one at a time as needed.

Ingredients:
Castille bar soap
Coconut Oil
Tea Tree Oil
Chamomile Oil
Lavender Oil
Silicone Mold


I grated the bar soap initially using a grater and then had pretty good luck using a rotary grater.

Spoonful of coconut oil

Stir coconut oil into soap and add about 10-20 drops of essential oils

Add enough water just to cover the soap

Simmer until melted


All finished. Using the silicone mold really made it super easy for these to pop out of the mold.

Cubes! 

I'm planning to store mine in an air-tight container. The cubes are about 1" square, about 0.5" deep and should make about 1-2 cups of solution each. The solution diluted should be changed out every few days but the cubes should last 4-6 months if kept in an air-tight container.

These cubes smell amazing and I hope the smell doesn't get too muted once it's diluted in the water---if so I'll just add more oil next time. I want to make some more batches to try different scent combinations so I'll keep you posted on those as well.

I have a few more posts to share this week, let's hope work calms down and I can actually post them! Enjoy the rest of your night and have a great week!

Mere :-)

::Craftie:: DIY Painted Lamp

Hello and happy long weekend to all!! I hope your Thanksgivings were all WONDERFUL! Mine was great although tiring---this mama gets pooped way easier than I used to. Typically, the hubs and I host Thanksgiving and we do all of the cooking. This year my brother volunteered to spearhead all cooking organization and took care of the bird, everyone else (myself included) contributed sides and desserts. Even though I didn't do near as much as I typically do, I was so tired!

While the nursery has been "done" for a few weeks, there have been some things that I have wanted to change or tweak now that we have been receiving shower gifts and organizing all of Henley's things. One thing we changed was the lamp. We came across one at World Market that we loved and just had to have. 

Originally we had this lamp in the nursery from Ikea. The main problem with this was the socket for the bulb was so tiny that the lamp didn't put out near enough light for that room.


Once we saw the lamp from World Market, I knew we had to have it. Only problem was that the lamp was off-white and the shade was white. I didn't want to purchase a new shade so to fix this, I decided to paint a diagonal stripe on the white lamp shade. Here are some pictures of the process:


Taped at a diagonal using blue painters tape. I didn't do any crazy calculations or measurements and just eyeballed these stripes. By the time I got to the end, I was out of room and the stripes on the back don't quite line up. This is also where the seam is and it's in the back so I really didn't mind the weird way the sides came together. 


Used Americana acrylic paint


I painted the gray first. In hindsight, the gray without the purple actually looked a little better than the gray w/purple. I could have sprayed the entire white lampshade with an off-white spray paint and then taped off and painted it gray. I think this would have looked a little better and would have helped with all over coverage but live and learn.


Added the purple and used a smaller brush to get close to the gray. Initially where the colors met there was little dots of light showing through here and there so I had to do some pretty tedious touch-ups to ensure every spot was covered. Like I said before, it might make more sense to paint the whole thing one color then tape off the stripes to avoid this.


After all of the painting and touch-ups, I love the end result. Here is the finished project with my lamp based that I LOVE! I think the quirkiness of the owl adds the perfect touch to her room.


I hope you all enjoy the remainder of the weekend! Enjoy it! :-)

Mere :-)

::Craftie:: DIY Pillow

Well the nursery is almost complete, just waiting on a few shipments from Etsy for finishing touches. It feels so good to have it almost complete. I absolutely love the room and I can't wait to share it with you guys!

One of the first thing I made for the nursery was a little owl pillow. I know you aren't supposed to put anything in the crib with the baby but for now, this little guy is just chilling in the crib waiting for Henley to come along.

I saw this pillow on the make it and love it blog and not only was it totally adorable, she provided a pattern to use. Making this first really helped me create a plan for my giant floor mat owl I made (see here).

I got all of my fabric on Fabric.com, they had the best deals compared to some other places I have seen and their shipping was pretty quick as well. Since the blog site has all of the details of making the pillow, I'll just show you guys some pictures I took during the process.

All of the pieces cut and laid out. This fabric is a super soft minky and since it's a furry texture, sewing the eyes out of it looked terrible so I ended up just using felt. The felt works great and was really easy to work with. (This purple for the wings ended up being hard to work with since it was so furry I ended up using a dark purple dot fabric).

The feet are stuffed and all of the front pieces are sewn together here.

All finished and stuffed---ready for Henley! 

This project wasn't too difficult at all, I highly recommend it, especially with the pattern that is provided. 

Hope you all have a great week and I'll be back Wednesday with a weekly update!

Mere :-)

::Craftie:: Fall Pinterest Party

This weekend I hosted my very first Pinterest Party. For those of you not quite sure what this is, it's a party where you and a bunch of friends get together, eat some great food from recipes found on Pinterest, and make crafts or other ideas from...yep you guess it...Pinterest!

I have been working on so many baby crafts lately that I thought a Fall themed party would be a great opportunity to branch out from my baby bubble. 

I made finger foods from recipes that I found on Pinterest (praying they didn't bomb since most were being made for the first time). I thought I would share if any of you were interested in your own Fall themed party.
Yummy!

I was thinking of using this pin to make mini caramel apples but then I saw this idea from this blog to make a DIY Caramel Apple Bar!
I bought bagged, pre-sliced apples for this since I knew the apples would be sitting out while everyone grazed and I didn't want them to brown. I skewered each slice and set out mini chocolate chips, coconut, mini marshmallows and candy corn for everyone to make their own caramel slices. My favorite combination was the chocolate chips with coconut. This was a really fun alternative to caramel apples and everyone was able to make their own variations and try different combinations.

Nothing exciting here, just hummus with carrots, cucumbers, and pretzels.

There have been many recipes (here, here, and here) for various fall trail mixes floating around Pinterest and I took a little something from each of these and came up with this yummy mix.
Fall trail mix: Cheezits, pretzels, Reese's Pieces, candy corn, chocolate chips, and salted peanuts

Pigs in a blanket are always a yummy, quick treat. I attempted to make them "mummy" pigs in a blanket but it wasn't working out so we just settled on the norm.
This recipe for stuffed mushrooms got tons of great reviews but didn't really seem to have much substance, various reviews altered it by adding sausage or crab. I added chicken Italian sausage to the mix and dipped the mushrooms, once stuffed, in bread crumbs and grated Parmesan cheese prior to baking.

This dip is delicious! It's a pumpkin dip with cool whip and was light and airy while still quite tasty. 
The creator of this used Nilla Wafers and apples as dippers, the apples were my favorite.

Decor from Jo-Ann's and everything fall was 40% off.

My father-in-law brought tables over that I put end to end on the balcony since our inside space is quite limited. Thankfully the weather wasn't too hot or humid once the sun set.
Fall table cloths also from Jo-Ann's. 

I didn't get pictures of anyone's crafts before they left but here is what I made based on this pin. I printed out the letters on legal paper and used an exacto knife to cut them out. Then I taped the outline of the letters to this foam pumpkin and traced the letters with pencil. Using acrylic paint in brown and a teeny paint brush I filled in the letters and topped it off with a brown polka dot bow. It's in our foyer as a cute way to greet guests.
It was a pretty quick and easy craft which I recommend for these kind of parties since you don't want anything too complicated.

This party was pretty fun and was one friend even suggested we make it a seasonal thing. Have any of you attended a Pinterest Party? What do you think?

Monday is over friends---one step closer to the weekend!

Mere :-)

::Baby G:: Owl Floor Mat

The nursery is almost done and I have been a crafting fool lately! The latest craft I made was an owl floor mat for the baby to play on. I found this one on Pinterest and I loved it but not only was it sold out but the color scheme didn't really match our theme either. After much consideration, I decided that making this was totally doable but I had some trouble getting started, I had no measurements and no pattern. Luckily I have a husband that works in construction and he helped me out big time.

First I printed the image offline and my husband went to work measuring out the full size and all of the individual parts (check out all of those measurements!)

We then taped two large pieces of freezer paper together to create a pattern. Once we had the measurements that we came up with plus the overall shape of the owl, we were ready to start cutting and constructing.


Here are some pictures of the process: 
All of the main pieces cut and waiting to be put together.

Fitz swears I am making this for him...

I did not use minky for the eyes since I didn't have white or black, I ended up using felt and I think it worked great.

Front and back put together

All Finished! I used batting for a bed comforter, doubled up, to make the inside padding and it seems to be just enough, we have tons left over.

When initially selecting a fabric, I didn't realize that minky would be any different to work with than other fabrics I have worked with in the past. I quickly learned that is not the case. I made a blanket first and then a pillow, which I'll blog later, and I realized these fabrics slip and slide like crazy. My biggest problem was seeing that my fabric which lined up perfectly when I started would be shorter by 5" or so on the top than on the bottom by the time I got to the end. To say the least, I got very comfortable with my seam ripper. 

After a few google searches, I found I am not the only person to encounter these problems and the easiest solution seemed to pin, pin, pin. I used so many pins that there was not a blank space on the edge that wasn't pinned and I waited until the last possible moment to remove the pin before it went under the sewing needle. Once I realized this, all sewing was perfect!

One warning on the minky though, it fuzzes like crazy when cut. My craft room is covered in "minky dust". Every time I looked down, my whole belly was covered in fuzz, I eventually kept a lint roller right next to me for my shirt, the desk, or even Fitz. Check out this picture where he fell asleep under the desk...

Overall I am extremely proud of this and so excited how it turned out. This is the first time I have really sewed something with a pattern I created and it actually worked. I used the same process as the pillow I made which did have a pattern so I think that helped. I'll be sure to post the pillow and blankets soon.

Tomorrow I begin my last week in the second trimester---insane! This pregnancy is flying by! Happy Tuesday all!

Mere :-)

::Craftie:: Homemade Cloth Wipes

Since we are under a hurricane warning thanks to Isaac, I thought today would be a great day for a craft. I've mentioned multiple times that we are planning to cloth diaper Baby G when she arrives but recently, I have decided to use cloth wipes as well. From what I have read, it's almost more of a pain to use disposable wipes when cloth diapering because you have to figure out a separate way to dispose of the wipe since the diaper gets thrown into the wash.

There are multiple brands (here, here, and here are just a few) that sell cloth wipes and we have registered for a few but I have also heard many bloggers and others mention how easy it is to make cloth wipes. I decided to go with flannel on one side of the wipe and terry cloth on the other. I picked a light purple color scheme, Jo-Ann's was pretty limited on their selection.

Fabric 

 Flannel: Light purple and white polka dots

Terry Cloth: Light purple solid

I cut the fabric into 8.5" squares, at least I tried to anyways, some ended up coming out various sizes----in the end it doesn't really matter so if yours are off from the 8.5", no biggie! I pinned the fabric with two pins on each side.


I started halfway down one side and sewed with a 0.25" to a 0.50" seam allowance all around, stopping short of where I started, leaving about 2-3" open. (Be sure to back-stitch the beginning and ending of your stitches so they do not unravel.) When turning the wipe for the corners, I made sure the needle was down in the fabric, lifting the foot and then rotating the fabric. This ensures you do not lose your spot when moving the fabric.
Starting point, be sure to back stitch

This is what it should look like with the 2-3" opening

After this part, I cut the corners of the fabric, this ensures a clean corner when turned inside out. It doesn't have to be perfect or neat as no one will ever see it.
Clipped corners

After you clip the corners, turn the wipe inside out being sure that you push the corners out as much as possible. When turned inside out, it will look like this. 

Tuck the opening in and iron the seam. At this point, you shouldn't be able to tell where the opening is without feeling for it along the edge.

After this, I top-stitched all around the wipe to close the opening and give the wipe a clean look. I sewed a 0.25" seam allowance, maybe a little less. You just need to make sure the opening is closed and the fabric is not sticking out of the seam.

Ta-da: Finished wipe!

I purchased a yard of each fabric and made 16 wipes. I probably could have made 2-4 more but decided 16 was plenty. Be sure to wash and dry the fabric prior to measuring and doing any cutting. The flannel shrunk up quite a bit.

Flannel and Terry Cloth Wipe

I'm really excited for these. We are planning to use these with a homemade solution of water, aloe vera gel, lavender essential oil, and tea tree oil. I am thinking that we will wet a few days worth of wipes in the solution and then store them damp in the Prince Lionheart Cloth Wipe Warmer. I know some people put the wipe solution in a squirt or spray bottle and apply it to the wipes as they get used so that is an option as well.

Anyone else planning on using cloth wipes? I'd love to see yours if you made any.

Onto Hurricane Craft #2!

Mere :-)

::Baby G:: DIY Blackout Curtains

Another project done! This past weekend we decided to conquer the curtain project to keep the sun from fading all of our new and exciting baby items! :-)

The nursery is the room of the house that gets the most sun as the sun sets on that side. While the sunset is gorgeous, it doesn't make for a room that will be conducive to midday napping. We knew we wanted blackout curtains but didn't want to pay the extreme prices that 108" curtains typically cost.

Last weekend I was doing a search and I came across curtains at amazon.com that were the perfect shade of purple in 58" x 108" for $18.99! Crazy cheap! I read some reviews and people commented that they were somewhat sheer. I knew I would be able to figure something out so I went ahead and bought them. 

They arrived on Friday and they are definitely sheer as in they should have been described as sheers not curtains. :-) The hubs and I turned them into blackouts and they are hung, all ready for the baby! Here is how we did it:

This is the window prior to curtains. These are 9' ceilings and the window is about 70" wide. (See here for the post about the canvases).

These are the curtains we purchased. After working with these curtains today, I have learned that there is a reason they were only $18.99, not the best quality but they definitely worked for what we needed.

We went to Jo-Ann's and purchased black-out material. They sell it in 54" rolls by the yard for $6.99 a yard (on sale today for 40% off). Since each panel of the curtain is 58" wide, the 54" width is perfect. We wanted the black-out material to be slightly more narrow than the curtains so the white didn't peak out when hung. The black-out material is vinyl on one side and feels more like a fabric on the other. We put the vinyl side facing out to the window, not sure it really matters which way it is hung.

The curtains had grommets at the top that were a bronzed metal. Originally I wasn't planning on changing anything with the grommets but when we purchased the curtain rod, we bought it in brushed nickel and it looks strange next to the bronze.

I cut the panel of grommets off from the rest of the curtain and ran a zigzag stitch to keep the material from fraying. I wasn't really careful or neat with this part since I knew it wouldn't show.


The hubs and I then laid the material on the floor flat and then laid the blackout material over the curtain. We cut the blackout material about an inch or two shorter than the length of the curtain and made sure to center it. I pinned a 2" hem at the top making sure to pin the curtain and the blackout material together. I then just ran a simple stitch along the top. (I didn't remember to take a picture of this part, oops)

The 2" hem wasn't wide enough for the curtain rod to go through without being too snug to move it. I ran to Jo-Ann's and bought rings with clips, in the end I think this is a much easier way to open and close the curtains so it ended up working out better than originally planned.

All that was left to do was mount the bracket and hang the curtain rod (all husband-ly duties).

We had a few hiccups during the process but overall this was a pretty simple project and much cheaper than purchasing two panels of 108" curtains.

Here is the finished project, a little hard to photograph since the sun was starting to set but as you can see, tons of light to cover.

With the curtains drawn, the blackouts are definitely doing their job! 

I hope this helps with many afternoon naps to come :-)

Hope you are having a great week! Happy Friday!

Mere :-)